Saturday, December 1, 2018

Simon Says Stamp Crafty Parcel!

Hello everyone! Let me preface this by saying that this is not something I normally would have purchased. I'm a bit of a control freak and the idea of spending money (especially $70) on a box of unknown contents was a bit scary for me. However, I took a chance. It was my one crafty Black Friday purchase for myself. Also, this is VERY LONG I'm sorry but there was just SO MUCH STUFF.


Now I will admit that I am VERY happy with this purchase. I had no idea what to expect, I just joined this crafty world earlier this year and I did not look at any reviews or unboxings from previous years.

I received about 45 items in my box. I did some research (out of curiosity) on what the full retail value of my box was and it came to about $430!! WOW. Now, not everything in my box is still available today, so for some items I had to find something similar within the same brand to estimate the price, so take that with a grain of salt.

Out of those 45 items, there were only 3 or 4 that I don't see myself being able to use. I did receive some dies without their coordinating stamp sets that really are not usable without the stamps, however, the stamp sets for two of them are still available for purchase, so I am considering purchasing them just for completion sake (and because I do actually like the stamp sets haha).

First, I'll get my not so great items out of the way. Pictured below are: 1. Heidi Swapp Marquee Light Box Slides...I do not have a light box for these and I have no desire to purchase one. 2. We R Memory Keepers stamp positioning tool...now, if I didn't already have the Tim Holtz stamping tool, this would've been like finding gold. This one is virtually the same size, so no point in keeping it. 3. Art Parts large blank binder sheets...I pretty much only make cards, I don't do a whole lot of other mixed media projects, but I suppose I could make some use out of these if I tried. 4. Illustrates Faith...plastic sheet of numbers? I thought these were stickers at first. They are not. I don't know what the purpose of this thing is. The only thing I can think of is to cut the numbers out for birthday cards or something. I'll probably hold onto it for that reason.


Now for what I'm calling in my head, my "medium" items. I received 4 sheets of Kelly Purkey stickers (2 look planner related, 2 number sheets), a Carpe Diem notepad, a sheet of puffy stickers by Pebbles, 3 sheets of shape sprinkles puffy stickers by Doodlebug Design, 1 large sheet of cardstock stickers by Doodlebug Design, 2 heavyweight pink cardstock envelopes, about a dozen sheets of 6x6 paper from what looks like a nautical pad, 8 sheets from another 6x6 pad that was maybe spring or birthday themed (there's no brands or collections listed on either of these, they were bundled separately in my box), a full 6x6 paper pad by Echo Park called I'd Rather Be Crafting, a pack of pocket pages by Me and My Big Ideas, and a set of cards by Goldenrod. I feel like I could find a use for all of this stuff between card making and my bullet journal.


Next are the embellishments, inks, and "miscellaneous" items. I got 3 samples of Novus plastic cleaners, a roll of washi by Doodlebug Design, Clear Drops by Studio Katia, Lemon Dust seed beads by Studio Katia, a set of pigment powder sprays (?) by Lindy's (apparently all I have to do is mix it with hot water...this will be fun to play with haha), and a 4 ink cube set by Fit Within in navy, coral, blue, and aqua. Edit: ah shoot, not pictured: 3 pieces of felt in blue, brown, and yellow, and a free crafting inspiration magazine by Kaisercraft from September 2016 lol.


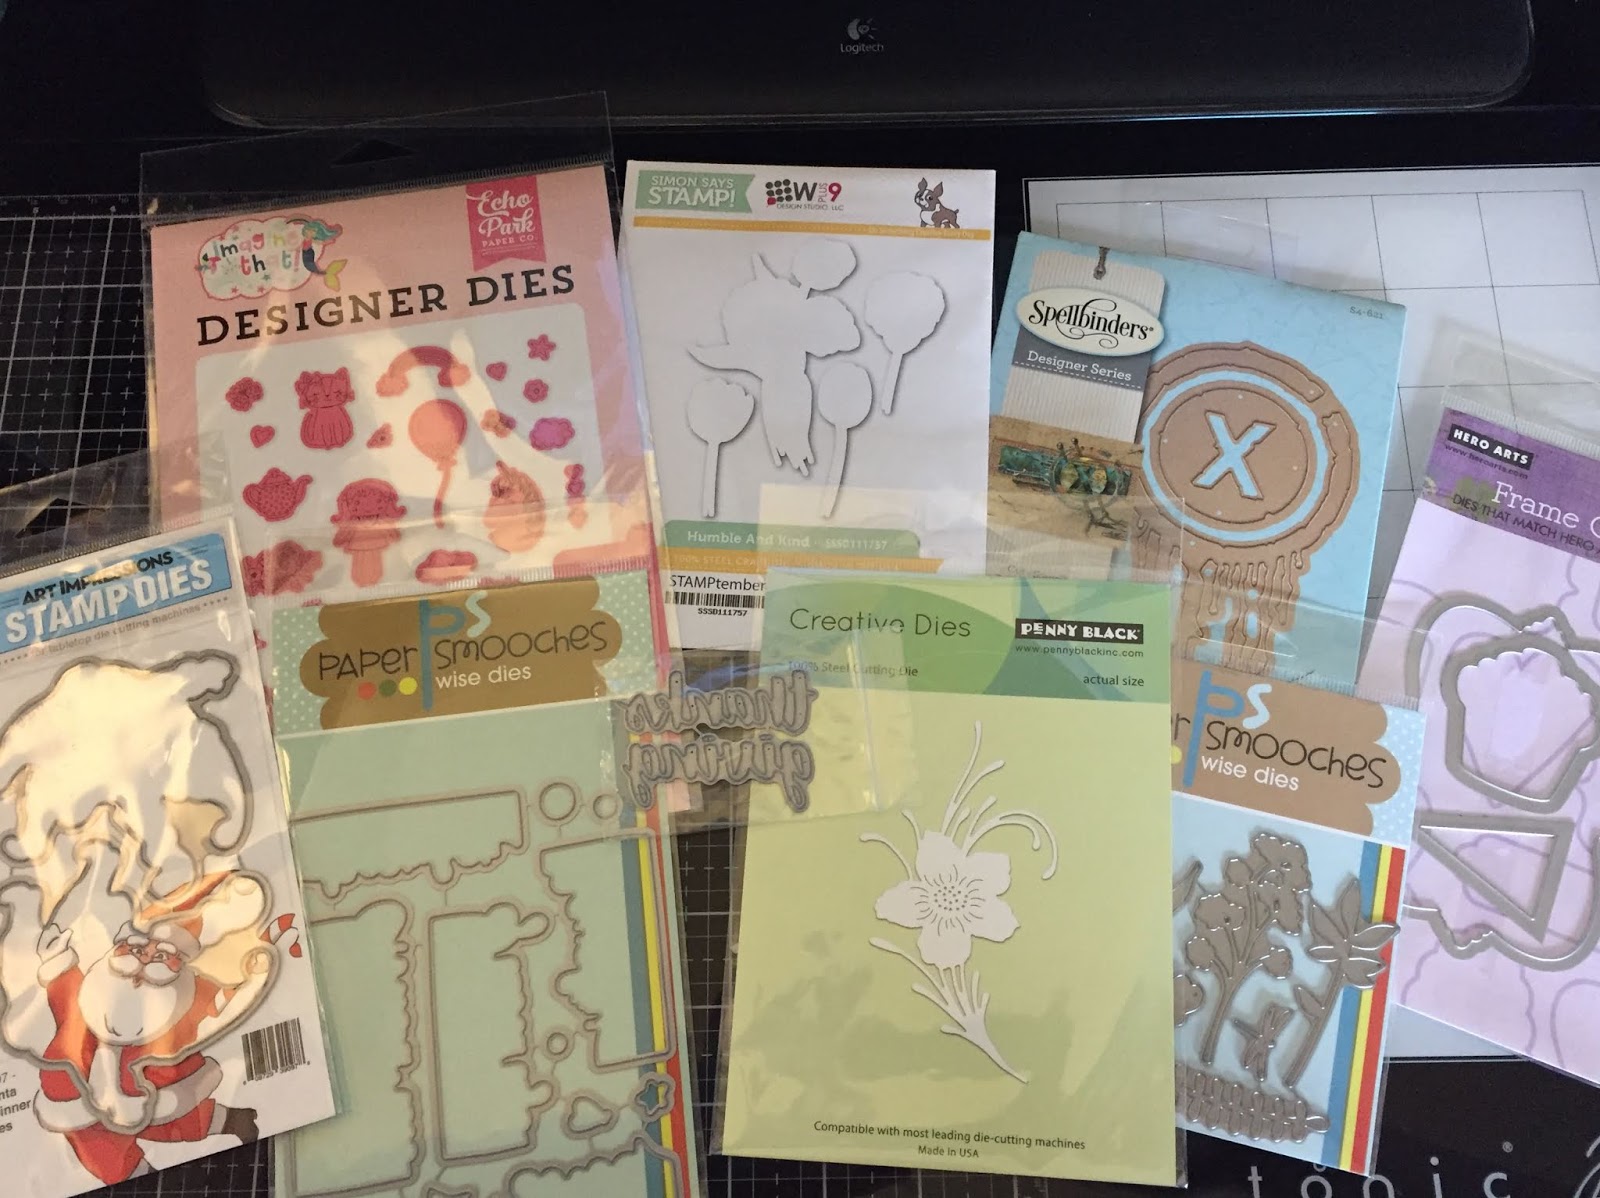
DIES...here's where a lot of the value is. On the left, I placed the dies that need coordinating stamps...I found the stamp sets for purchase for all but the santa spinner by Art Impressions (I actually found it on ebay for about $9 but I'm only counting the ones that are available on legitimate craft sites still as new products) and the SSS/W plus 9 because it was a Stamptember set. In addition to santa, I got Echo Park Wonderful Day dies, Paper Smooches Boxed Greetings dies (LOVE this stamp set even though it seems to be out of stock on most sites right now and this die set runs about $27.99!), a Thanks Giving die (don't know brand, guessing SSS), Humble and Kind dies from W plus 9/SSS Stamptember 2017 (I feel I can still use most these even without the stamps), Penny Black Gaiety flower die, Spellbinders Drip Drop die, Paper Smooches Silhouette Flowers dies, and Hero Arts frame cuts in the shape of a fancy frame, cupcake, and pennant (could not find any stamp set for this but it is very usable without one).


And last but definitely not least, STAMPS. The paper crafting heart of the crafty parcel. I received 7 stamp sets in my parcel. Incredible. First is by Penny Black called The Best, Right at Home called Bits and Pieces: Winter, Gerda Steiner Holiday Friends, Hero Arts Valentine Messages mini tub, Carta Bella Practically Perfect, Simon Says Stamp/Neat & Tangled Stamptember 2017 Hello Pumpkin, Simon Says Stamp/Heffy Doodle Stamptember 2018 More Than S'Mores, and 2 small stamps from Paper Artsy, one is a 2 pence stamp, the other says Stamp of Approval.


Oh wait I forgot one, the WINNER WINNER CHICKEN DINNER of this purchase. I received the stamp AND die set of this year's Stamptember Lawn Fawn collaboration Nutty or Nice!!!! I did not purchase this set during Stamptember and I had been regretting it so I was THRILLED to see this in my box. Thank you Simon Says Stamp!!


PHEW. That's all folks. I will definitely continue purchasing these crafty parcels in the future if they are offered. The greatest part is a lot of this I might not have purchased on my own, so it will allow me to maybe stretch my style a bit, and I didn't own ANY of these items already. If you made it through this whole post, thank you for reading!!

Thursday, October 4, 2018

Christmas Deco

Hello, just stopping by to share a Christmas card that I am loving! Not to toot my own horn or anything.


For this card I used Gina K Christmas Pine cardstock as the backing panel. For the front panel, I used kraft cardstock from Michael's, colored with Prismacolor pencils in espresso, silver, kelly green, and pumpkin orange, using the Simon Says Stamp Mod Stripe stencil and die cut with a stitched rectangle die from Lawn Fawn. The tree was cut using one of the deco tree dies from Spellbinders out of the same Christmas Pine cardstock from Gina K and brushed with some wink of stella. I backed it with some vellum to help it stand out against the background. I also cut a strip of vellum and silver heat embossed the sentiment from Lawn Fawn. That is all for today!

I am entering this card in Simon Says Stamp's Wednesday Challenge


Saturday, September 22, 2018

Tim Holtz Christmas

Two card shares in one day??? What!? haha, well I'm not going to go into detail on this one (for now at least) but I will leave you with pictures of the final card and most of the supplies I used. This card is made with mostly Tim Holtz products.


Polar Holidays

Today I have a card to share using some Lawn Fawn products for the Simon Says Stamp Stamptember celebration.


For this card, I used Lawn Fawn's horizontal snowfall backdrop on navy cardstock (I believe it's called blueberry sour from Bazzill). I backed it with Lawn Fawn's pixie dust cardstock (I LOVE IT) so the snowfall would have some built in sparkle. Then on some scrap cardstock, I stamped the polar bear image from the new Winter Skies set with Gina K's black amalgam ink, colored it with some gray and red Copic markers, and added some glossy accents to the scarf. I fussy cut it out and was about to mount it to the snowfall backdrop when I realized it was missing something - snow on the ground! So I don't have any hill or snow bank dies, so I hand cut some of the same pixie dust cardstock to make it look like rolling snowbanks, then glued it to my backdrop and mounted the polar bears with some foam adhesive. Finally, I stamped the sentiment from the Lawn Fawn Simply Winter Sentiments set, cut it with my paper trimmer, and adhered it to the front of my card with some foam adhesive. I adhered it to a card base and that's all she wrote, folks!

It's simple but I really like it. Thanks so much for checking out my blog!

Jaclyn

Monday, September 3, 2018

Stained Glass Mosaic

Hello again! Today I have a card to share with you and I am quite happy with how it turned out. It's going to be another entry into Simon Says Stamp's Wednesday Challenge for Anything Goes.


I call this card "Stained Glass Mosaic" because of the design, the shine, and the colors. I first die cut the Moroccan Mosaic cover die from Altenew 3 times. I glued one cut to a panel and then colored in the individual spaces with copic markers. Then, I glued the 2 other die cuts on top of the colored one to create dimension. After that I filled in all of the spaces with Nuvo crystal glaze, making sure to spread it evenly and even up the sides of the die cuts (and then of course adhered it to a card base). I decided to leave this without any sentiments because I love having some blank ready-to-go cards for whatever occasion that may come up (and I don't have any "just because" sentiments in my stash yet lol). Overall it is a simple card to make, but I love the look that the glaze gives it, especially with this die.

Thanks for checking out my blog!!

Jaclyn xx

Thursday, August 30, 2018

Halloween by Hand

Hello again everyone. Today I'm going to show you a Halloween card. Now. I have not been doing this for very long. I started browsing blogs and youtube in June and prior to that did not own anything but watercolor paper and a cheap set of paints from Walmart lol, so my "stash" as everyone calls it, is very minimal. I have so many things in my wish list but I can only afford a couple things at a time (student loans, ya know?). SO I do not own any actual autum/fall/Halloween things. I wanted to see if I could make something with what I had though, and here it is.


I started on a 4.5x6  panel of Bristol paper. I just got some Distress Oxides and was very eager to try them out, so using Vintage Photo, Fossilized Amber, and Spiced Marmalade, I blended out a background. I ended up spritzing a bit of water because I wanted to see the cool reaction for myself (ha) and then discovered in my stash, a background stamp I received from a friend that I originally thought was broken/cracked glass, but indeed looks to be spider webs instead (or as well?). I stamped it with VersaFine onyx black ink and heat embossed it using holographic embossing powder by Ranger.


I ended up leaving it for a few hours because I was a bit stuck. I wanted a character for the card to go with the sentiment but I didn't know what. I wanted to do a spider (because webs) but everything I drew just did not look right. I ended up free handing a bat. I colored him in with some Copic markers (100, N0, and N6), fussy cut him out, and fixed him to my panel with some foam tape.

For the sentiment, I used some more Spiced Marmalade Distress Oxide on a scrap of cardstock. With Claire's ABC's from Lawn Fawn, I stamped out Happy Halloween and heat embossed it the same way I did the background and adhered it to the front of the panel with foam tape. I glued it to a card base, used some black Nuvo drops on the bat's eyes, and gave him a little flair with some wink of stella.

Thank you for checking out my blog!

I am entering this creation in Simon Says Stamp's Monday Challenge!


Sunday, August 26, 2018

Sending You a Latte Love

Hello again, this is Jaclyn back with another card to share. I haven't had too much spare time lately to create but I finally had a few free hours last night. This card I made using the August 2018 My Monthly Hero kit from Hero Arts and the Moroccan Mosaic stamp set from Altenew.


On a piece of brown cardstock from recollections I stamped the Moroccan Mosaic background stamp with Versamark ink. I brushed it with perfect pearls in bronze and then I used a technique that I learned watching one of Jennifer McGuire's videos and I turned the panel a quarter turn and stamped it with Versamark ink again to create a tone on tone look.

Then I took a piece of off-white card stock from recollections (all cardstock was from the coffee and cream pack), and die cut out a circle. I stamped one of the coffee cup images from the Hero Arts kit as well as the steam squiggle in versafine ink in onyx black and I heat embossed it with clear embossing powder. I used my waterbrush with distress ink to color in the image (I think walnut stain, tea dye, and ground espresso...I'm not 100% sure because I actually cleaned up after myself last night lol). I trimmed a straight edge on the circle and adhered it to the panel with foam tape.

Lastly, I stamped my sentiment from the kit with versafine onyx black ink and heat embossed it with clear embossing powder, trimmed it down, and adhered it to the panel with foam tape. I used my tape runner to adhere the panel to my card base and voila, my card is finished! Thanks so much for visiting my blog!

I am entering this card to the Simon Says Stamp Wednesday Challenge